Remove background
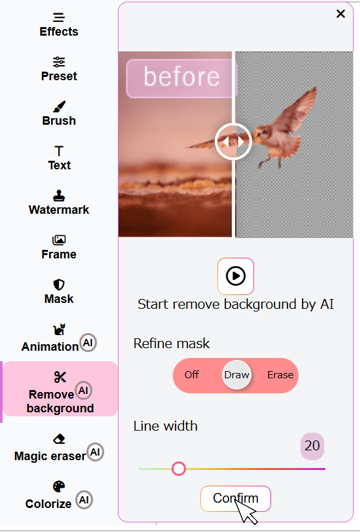
Recognize the mask by AI tool
When you start removing the background with AI, the AI will typically recognize the object and automatically create a mask that highlights the area you want to keep.

Refining the mask by brush
After recognizing the mask, you may need to refine it to ensure it accurately captures the object without including unwanted parts by drawing or erasing.

Confirming the mask
Once you're satisfied with the mask and the object is accurately selected, confirm the mask by clicking 'Confirm' button. The background will be removed, leaving only the object with transparent space around it.
Magic eraser
Step 1: Erase object
Initially, brush over the object, and apply Step 1 to remove it from the image.

Step 2: Enhance the background
Next, brush over the erased area and apply Step 2 to enhance your current background by entering your prompt. Below are some samples of prompts.
- Green grass in the landscape, green trees, high resolution
- A serene mountain landscape at sunrise, with a clear blue sky but without any people or buildings in the scene.

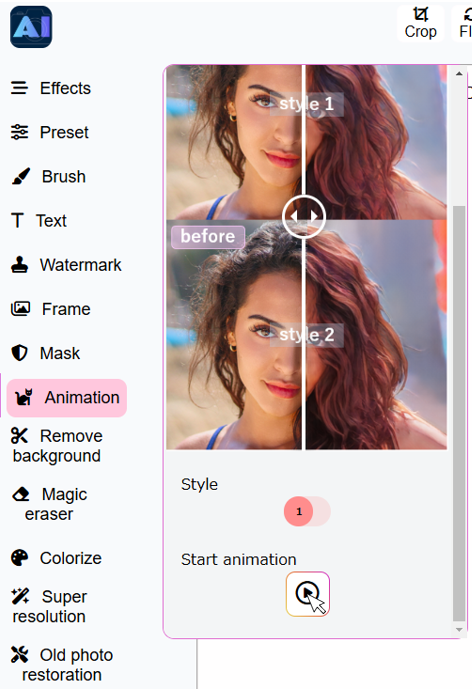
Animation
Crop the photo
Begin by cropping the image to focus on the main subject or a specific area of interest. Ensure the cropped selection highlights the key elements you wish to animate.

Animate the portrait or landscape
Once the image is cropped, there are AI animation tools you can use to animate the portrait. Here are a few options:
- Landscape – This tool animates landscapes, bringing them to life with a realistic effect.
- Portrait – This tool allows you to animate faces in a fun way using pre-built animations.

